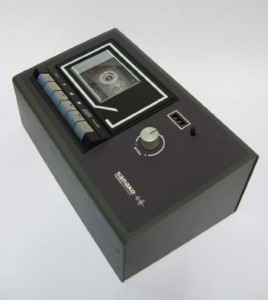
 Summary. This page offers simple setup instructions for the Sanako / Tandberg Educational Lab 100 external cassette tape deck drive. For more reading, Wikipedia has additional information about Sanako and Tandberg Educational. The following lengthy PDF manuals are also available:
- Sanako Lab 100 User Guides – Page 149 in the English guide has instructions about cassette deck installation.
- Sanako Lab 100 Master Cassette Tape Drive Deck Documentation
Instructions. Here are the simple instructions for cassette tape deck/drive installation. If these don’t work, it may be necessary to refer to the full set of instructions linked above.
- Exit out of all software and programs on the teacher station (Windows computer) where the Lab 100 software is normally running.
- Turn off the System Connection Unit. It is the box with lots of CAT5 (like networking cable) ports on the back. It is typically sitting on top of the MSU.
- Plug the CAT5 cable from the cassette deck to the back of the System Connection Unit. Choose an available port and note the number of that port. Don’t choose any port that has a special designation written next to it. Just choose one of the numbered ports like 20. The CAT5 cable will serve as the audio connection and power cord for the cassette deck.
- Start the Lab 100 Config software. If you get a System Manager Error, the Lab 100 software may not have exited fully. Click the No button. Then restart the Lab 100 Config software. Once the Config program has started properly, the student station’s may be gray with a yellow box and wrench symbols next to them. This can happen with some Lab 100 installations. If this happens, click the Find Workstations button. Then walk around to each student workstation and, using the number keys, enter the two digit number for that station. Once complete, click the Save button in the Config software. All stations should have green boxes now.
- Click on the Set Audio Sources button found in the right side of the screen.
- In the resulting window, you’ll see some audio sources listed under Source Type. This is where you’ll be adding the Cassette Deck as an External Source.
- Find the next available blank entry on the list, and choose External Source from the drop-down menu.
- Provide a Source Name for the device such as Cassette External.
- Under the Port Number heading the Current box will be blank. From the Set drop down menu, choose port 20 (assuming that’s the port you plugged the cassette deck into).
- For Video Source, leave this as No Video.
- Click the Okay button to save the Audio Sources settings you’ve entered for the cassette deck.
- Now, when using the Sanako Lab 100 software, the Cassette External will show up as an available audio source for activities such as Listening Comprehension.